
"Poor Man's Sonos" - Whole Home Audio for almost nothing!
Walking through my house, music follows me seamlessly—basement to upstairs, without missing a beat. Perfectly in sync.
But unlike those $1000 Sonos setups, I built this for next to nothing using old thin clients, an Ubuntu VM, cheap speakers, and some clever open-source magic.
The Hardware Lineup
- 3x POP OS Linux thin clients
- 1x Raspberry Pi 3
- Ubuntu VM (central audio server), is always running anyway
- 4x Amazon Basics USB-Powered speakers (3.5MM) - These things are incredible for the money.
Server Setup: Snapcast Snapserver
Install the below on your server, ie a VM or PC on your network, preferably wired, that is always running. A static IP is also a very good idea.
The snapserver manages sending the audio to the clients.
Install snapserver - (github badaix/snapcast)
sudo apt-get update
sudo apt-get install snapserver
Raspotify for Spotify Connect (librespot is included in this)
This whole software is not going to be used by the server, but librespot is conveniently included.
sudo apt-get -y install curl
curl -sL https://dtcooper.github.io/raspotify/install.sh | sh
Configure /etc/snapserver.conf
[server]
host = 192.168.1.104

[streaming_client]
initial_volume = 30

[stream]
source = librespot:///librespot?name=Spotify&devicename=PoorMansSonos&bitrate=320&volume=100
source = airplay:///usr/bin/shairport-sync?name=Airplay&devicename=PoorMansSonos
The two sources above allow people with iPhones to use Airplay, and those with Spotify to use Spotify Connect. When you open your Spotify app on your same wi-fi, "PoorMansSonos" will show up as a castable speaker.
Install Airplay (Shairport-Sync)
sudo apt-get install shairport-sync
Start the service and set it to run on boot
systemctl start snapserver
systemctl enable snapserver
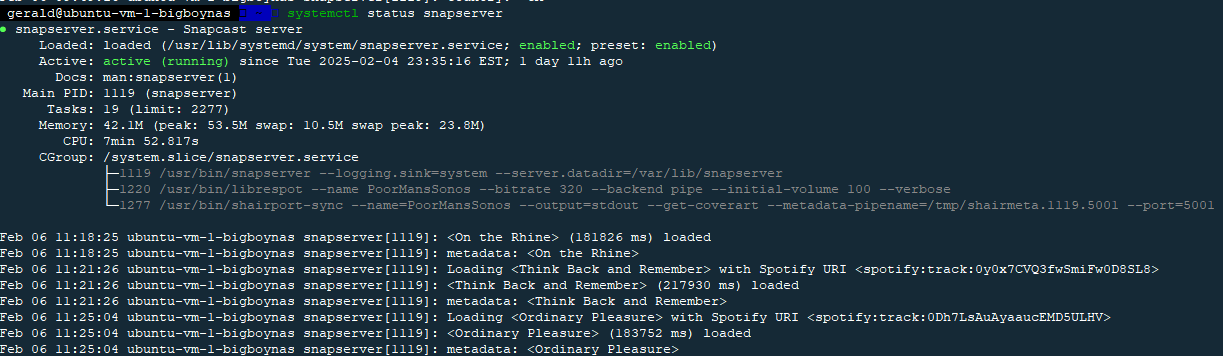
systemctl status snapserver
Ensure the service is Enabled so if your VM / server restarts, the service is autostarted.

Even when streaming to 4 clients, the process is very lightweight. 42MB memory usage, below.
Client Configuration
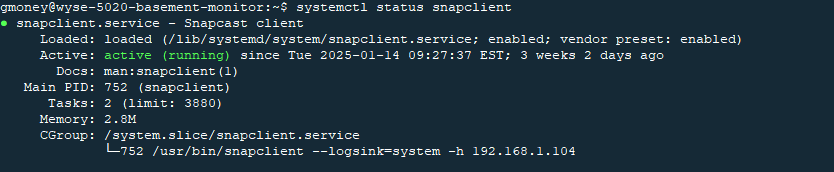
sudo apt install snapclientOn each client (e.g., Wyse 5020), configure /etc/default/snapclient:
START_SNAPCLIENT=true
SNAPCLIENT_OPTS="-h 192.168.1.104"
systemctl start snapclient
systemctl status snapclient
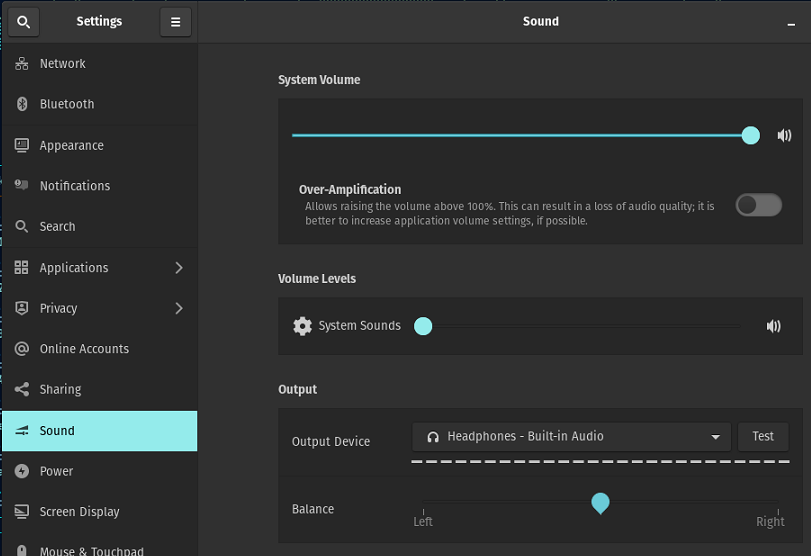
systemctl enable snapclient- Remember to increase the client OS volume to max volume (Snapclient will control the volume of the audio) and plug in the speakers. :) derp derp hurr. This means as soon as the client boots, it will start snapclient, connect to the server, and become a target for audio.
- Also remember to set the audio output to the speakers if you are using 3.5MM headphone jack.
Home Assistant Integration
- Open Home Assistant
- Go to Configuration > Integrations
- Click "+ Add Integration"
- Search for "Snapcast"
- Enter Snapserver's IP (192.168.1.104)
- Click "Submit"
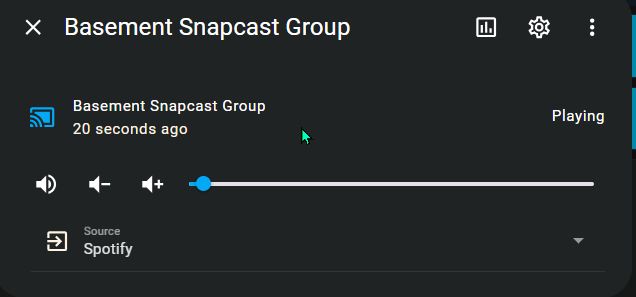
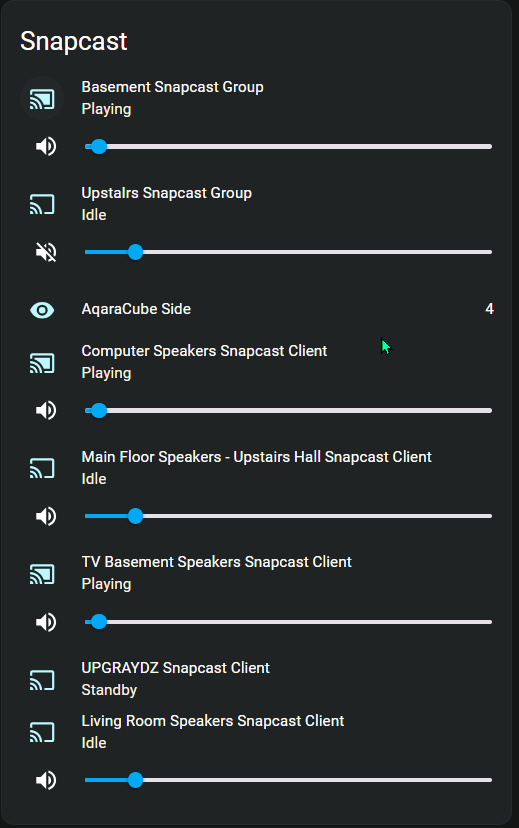
The speakers and speaker groups will show up as entities. I made a card for my dashboard to easily mute and unmute the groups.
It can't be this good for free
The real surprise? My wireless Linux POP OS client stays perfectly in sync. This is open source software. My god!
Walk from upstairs to basement, and the music follows—zero stuttering, zero delay.
I am incredibly impressed with this.
Speaker Groups
I used SNAP.NET for Windows to create and manage speaker groups:
- Basement Group: 2 thin clients
- Upstairs Group: 1 thin client, Pi3
I have no idea how to do it via commandline or web interface, but there must be some way.
Pro Tips
- Reuse old hardware. Use whatever speakers you have laying around
- Wireless thin clients work surprisingly well and can be hidden away in bookshelves etc just sitting there waiting for audio
- Home Assistant makes management a breeze
Total cost? Basically nothing. Whole-home audio experience? Priceless.
Bonus Automation: Magic Volume Control
Want to take your setup to the next level? I added an Aqara Zigbee Cube that lets me control volume with a simple rotation. When the cube is on its side 4, rotating left drops the volume, and rotating right raises it across multiple speaker groups.
alias: Cube Side 4 Snapcast rotate right = Vol up
description: ""
triggers:
  - topic: zigbee2mqtt/AqaraCube
    trigger: mqtt
conditions:
  - condition: template
    value_template: "{{ \"rotate_right\" == trigger.payload_json.action }}"
  - condition: and
    conditions:
      - condition: state
        entity_id: sensor.aqaracube_side
        state: "4"
actions:
  - data: {}
    action: media_player.volume_up
    target:
      entity_id: media_player.XXXX_snapcast_group
  - data: {}
    action: media_player.volume_up
    target:
      entity_id: media_player.main_floor_speakers_upstairs_hall_snapcast_group
mode: single


-----


alias: Cube Side 4 Snapcast Rotate left = vol down
description: ""
triggers:
  - topic: zigbee2mqtt/AqaraCube
    trigger: mqtt
conditions:
  - condition: template
    value_template: "{{ \"rotate_left\" == trigger.payload_json.action }}"
  - condition: state
    entity_id: sensor.aqaracube_side
    state: "4"
actions:
  - data: {}
    action: media_player.volume_down
    target:
      entity_id: media_player.XXXX_snapcast_group
  - data: {}
    action: media_player.volume_down
    target:
      entity_id: media_player.main_floor_speakers_upstairs_hall_snapcast_group
mode: single
Just twist the cube, and your whole-home audio system responds. Talk about sci-fi living!